How to run Kubernetes using Docker for Mac
The Docker team announced support for running Kubernetes using the Docker for Mac application. For a while, it was only available on unstable Edge releases of the Mac application.
Docker for Mac’s Kubernetes cluster is now available in the stable release channel! 🎉
This makes running Kubernetes for local development so much easier. You no longer need to install and run a separate cluster using something like Minikube. (Though, if you need to, I have a guide on installing Minikube on your Mac.)
It's available on Docker Community Edition version 18.06.0-ce-mac70 2018-07-25 or later.
Setting up kubectl with Docker for Mac Kubernetes
Setting up kubectl to use Docker for Mac is simple.
If you don't already have kubectl installed, the easiest way is with Homebrew.
brew install kubernetes-cli- Install the most recent version of Docker for Mac, one that includes the Kubernetes cluster functionality.
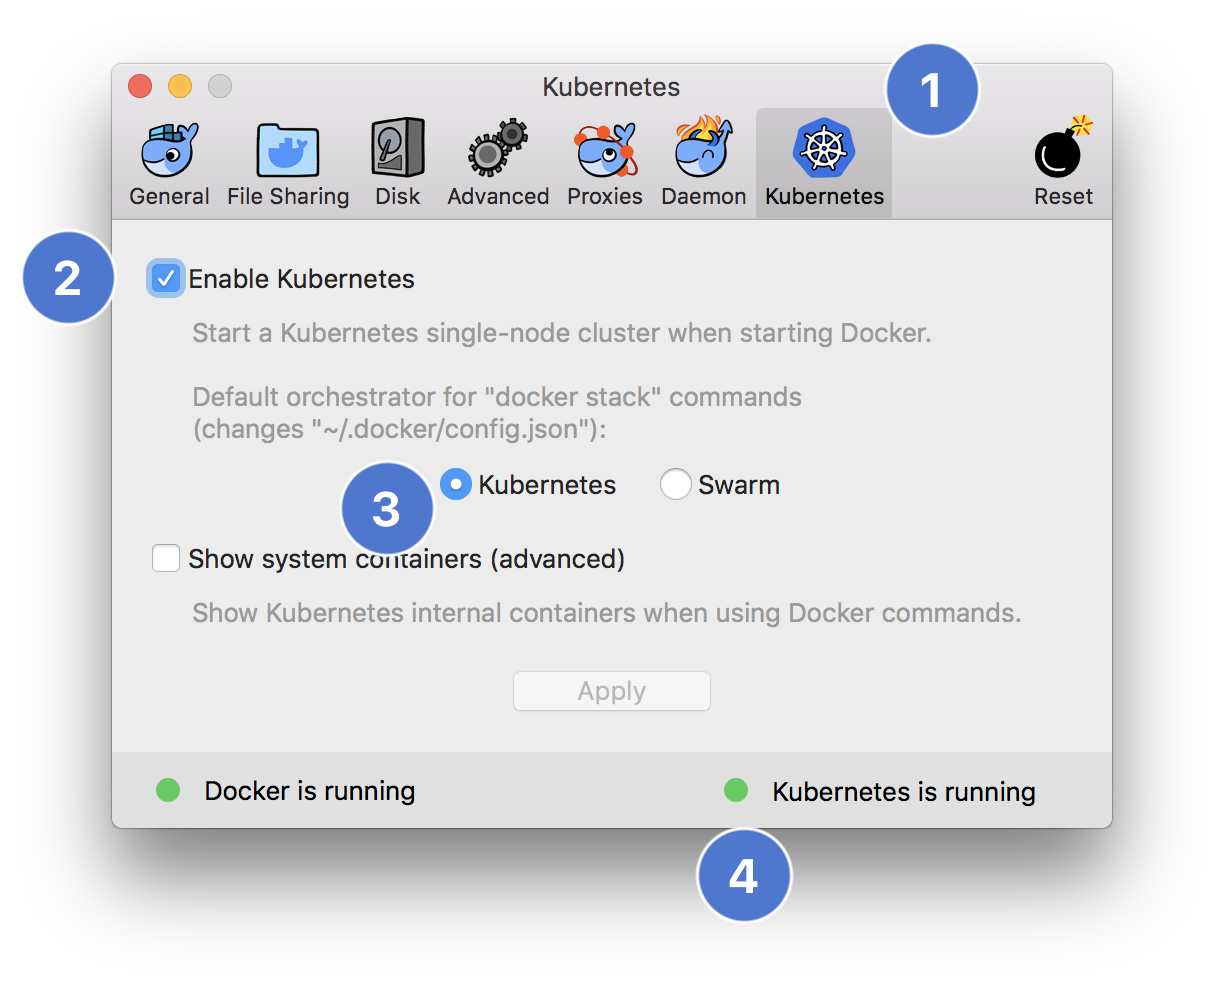
- Click the Docker menu bar icon > Preferences, then click the Kubernetes tab. Click the checkbox
to enable Kubernetes and switch the default orchestrator to Kubernetes. Docker might take a few
minutes to install more components here.
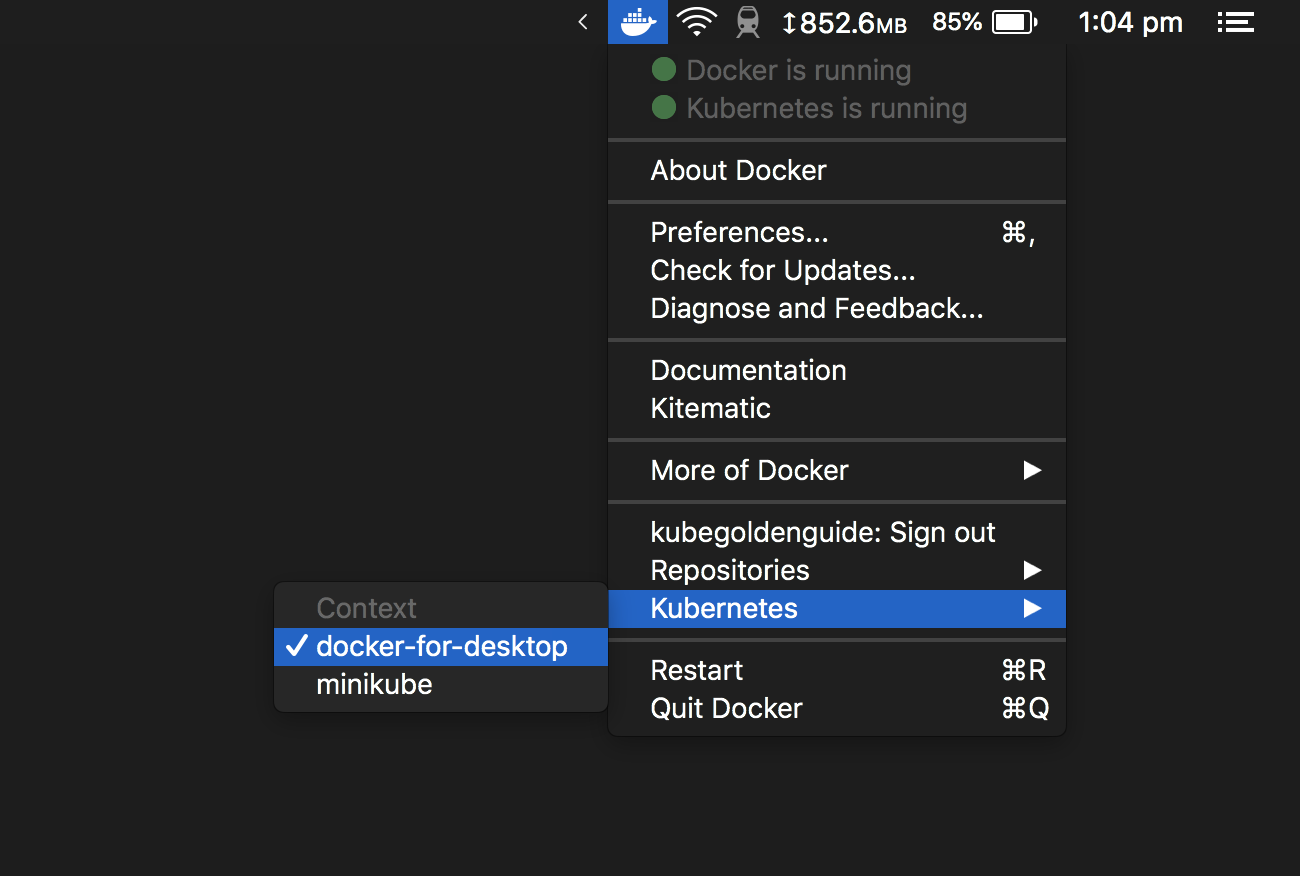
- Docker for Mac will start the Kubernetes cluster. Once it’s running,
click the Docker menu bar icon again and expand the Kubernetes menu item. Then under Context, select
docker-for-desktop. This will switch kubectl to thedocker-for-desktopcontext.
- Run
kubectl config current-contextin a Terminal window. It should outputdocker-for-desktopif kubectl’s context has updated. - If you’re curious, you can also see the configuration settings that kubectl uses
to connect to Docker for Mac’s Kubernetes cluster. Run
kubectl config viewto output all your available kubectl contexts. (I have a chapter in my book that explains kubectl config in detail)
Running your first Kubernetes pod with Docker for Mac
Once you’ve set up kubectl to use Docker for Mac’s Kubernetes cluster, you can run your first pod!
Create a file called pod.yaml containing the following YAML configuration.
Now run the pod, and then check its status as it gets run on Docker for Mac’s single node cluster
$ kubectl create -f pod.yaml
pod "example-pod" created

$ kubectl get pods
NAME          READY     STATUS    RESTARTS   AGE
example-pod   1/1       Running   0          2m
Does this replace Minikube?
I’d expect Minikube to stick around for a while—it’s a much more stable and mature implementation of a single-node Kubernetes cluster that you can run locally on your Mac. But Docker for Mac is a great, simple way to run a simple cluster on your local machine. Plus, the Docker menu bar icon gives you a new, fast way to switch kubectl contexts.
Learn Kube Faster.
Get the #1 guide.
Get my book on Kubernetes for software developers, used by engineers at Google, Microsoft, and IBM.
Get Book